In this tutorial, we’ll see how we can add perfectly responsive tooltips to any Bricks elements.
Table of Contents
Introduction
Tooltips can be a great way to show additional information to your visitors in a modern and elegant way. While you could create tooltips using pure CSS, it often fails to be responsive and include dynamic content.
In this tutorial, we’ll see how to leverage JavaScript to easily create perfectly responsive tooltips in a matter of seconds!
Enqueue the scripts
The first thing we need to do is to enqueue two libraries: popper.js and tippy.js. My personal favorite method to enqueue scripts and libraries is described in this article, but feel free to use the method you feel comfortable with.
We also need to enqueue the Init script. Paste the following JavaScript code – make sure to run it after the popper.js and tippy.js libraries have been initialized on the page:
// Load the Init script once the DOM content is loaded
window.addEventListener('DOMContentLoaded', () => {

   // Query all the elements with data-tooltip attribues
   const tippies = document.querySelectorAll('[data-tooltip]');

   // Stop the script if no element with data-tooltip attribues is found
   if (tippies.length < 1) return console.log('No tooltip found.');

   // Loop inside all the tooltip elements
   tippies.forEach(el => {

      // Parse the JSON object options
      const options = JSON.parse(el.dataset.tooltip);

      // Init the tooltip
      tippy(el, options);
   })
})
Add the data-tooltip attribute
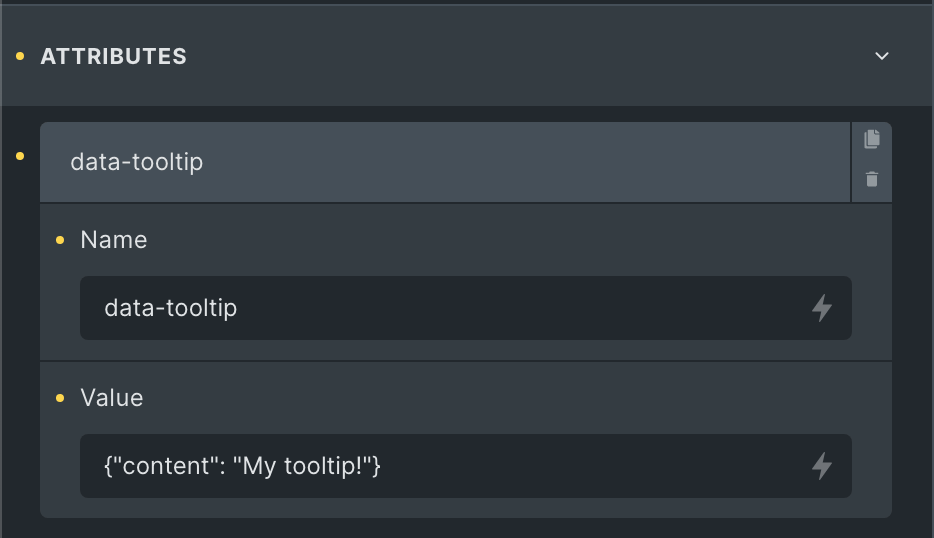
Let’s now create a data attribute called data-tooltip on the trigger element.

Inside the value field, paste a JSON object with all the tippy parameters that you need.
Dig inside the parameters included inside the tippy library. They will allow you to use custom HTML content, custom placement, custom styles, custom triggers, etc… Sky is the limit!


