This tutorial provides the JS & PHP codes that can be pasted in order to create smooth parallax effects using the Rellax.js library when using Bricks Builder.
Table of Contents
- Requirements
- Add the rellax.js library to your child theme
- Create an init.js file
- Enqueue the scripts on your page
- Add the parallax effect to any element in Bricks
- Conclusion
Requirements
- Bricks Theme (any version)
- Bricks Child Theme
Add the rellax.js library to your child theme
The first thing to do is to download the last rellax.min.js file on the library’s author page and upload it inside your child theme folder.
Create an init.js file
The next step is to create an init file (we called ours rellax_init.js) that will trigger the library and paste the following code:
window.addEventListener('load', () =>{
    const relax = document.querySelectorAll('.rellax');

    if(relax.length > 0){
        var rellax = new Rellax('.rellax', {
            center: true,
        });
    }
})
Enqueue the scripts on your page
Let’s now enqueue our files inside our functions.php of our child theme. I personally prefer to conditionally enqueue my scripts using a true/false acf field as described in this tutorial. So my code will be:
add_action( 'wp_enqueue_scripts', function() {
   // Enqueue your files on the canvas & frontend, not the builder panel. Otherwise custom CSS might affect builder)
   if ( ! bricks_is_builder_main() && class_exists( 'ACF' ) ) {

        // Enqueue all your other scripts here....

        // RellaxJS scripts
        if ( get_field('activate_rellaxjs' ) ) {
		wp_enqueue_script( 'rellax', get_stylesheet_directory_uri() . '/js/rellax/rellax.min.js', array(), '1.12.1' );
    		wp_enqueue_script( 'rellax_init', get_stylesheet_directory_uri() . '/js/rellax_init.js', array( 'rellax' ), filemtime( get_stylesheet_directory() . '/js/rellax_init.js' ) );
	}
   }
});
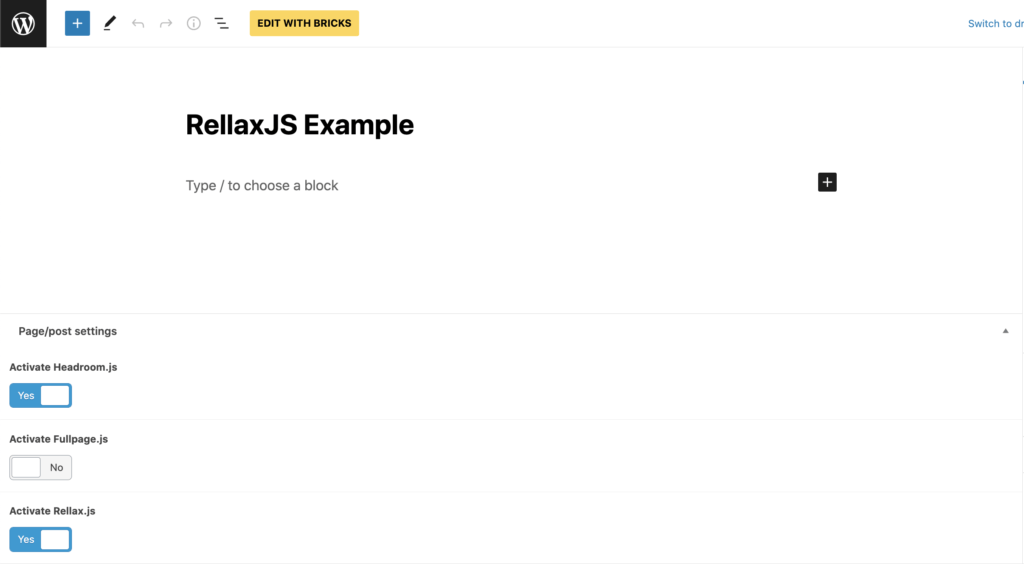
On the edit page, make sure to toggle on the ACF custom field to correctly enqueue your scripts.
Add the parallax effect to any element in Bricks
To activate our parallax effect on any element, we just need to do 2 things:
- Add the
rellaxclass to our element

- add a data-attribute
data-rellax-speedto indicate the speed of the transition (from -10 to 10).

Conclusion
If everything worked, you should now see your parallax effect when scrolled on the frontend. As an example, we added the effect on both the image and the :before background element here:
Remember, slight parallax effects can be cool but don’t abuse it or your website will be a mess 🙂




4 comments
Nico
Thank you very much for this which was very informative for a new Bricks user.
How do I implement this on a simple section with a background image? I have section > container > header with a full width background image on the section. I'd like the section (50vh) and header to scroll normally but the image to scroll more slowly.
I got it working by adding the image into a block below the header container and using positioning to keep the text centered over it but it doesn't look write as the heading doesn't stay centered,
Lukáš Jakab
Hello Maxime,
first, your tuts are absolutely precious, thank you so much for the quality and speed in which you publish new cool stuff.
I have troubles implementing it on 1.5 RC. Are there any requirements for the parallax to be working like wrapper type (div/block) or its properties (position, background attachment: scroll/fixed etc.)? Or maybe I set ACF incorrectly not sure.
Alejandro
The same thing happened to me that first it didn't work for me but then I saw that the js files should go inside the child folder and create a folder called js, inside that folder include the rellax_init.js file and a folder called rellax, where it goes the other rellax.min.js file.
Maxime Beguin
Hey Lukáš,
Thanks for the kind words!
Div/block or positioning shouldn’t be affected by the script as it applies a transition:translate() to the element. Could you give me some more details to try to debug your issue? Do you see any errors in the console logs? Can you see the scripts (including the init.js file) loaded correctly on the page? Please double-check your source page code and check if you see the scripts at the end of the body tag. If these check all the boxes, make sure the trigger class is set properly? Let me know!