In this tutorial, we’ll learn how to add a progress bar to our nested slider element in Bricks.
Table of Contents
Introduction
A user recently asked in the Facebook Community how to create a progress bar for the nested slider element as shown on the SplideJS website. Unlike other libraries, SplideJS requires some custom JavaScript code in order to display it.
Let’s dive in and see how we can implement it in Bricks!
The DOM Tree
Let’s recreate the following structure and add the classes as follows:
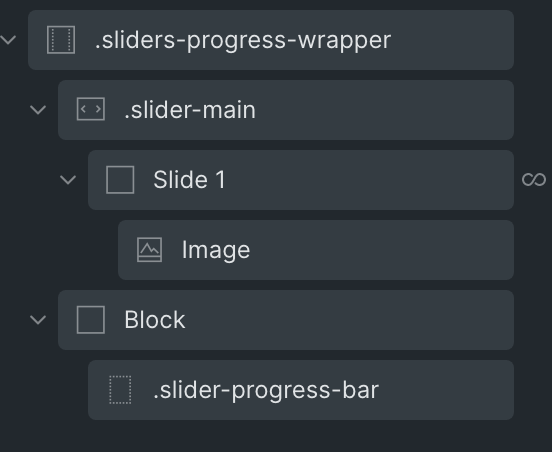
You’ll notice that the progress bar is wrapped inside a Block element (that doesn’t require a specific class in order to work). We use that wrapper to set a background color to the progress bar:
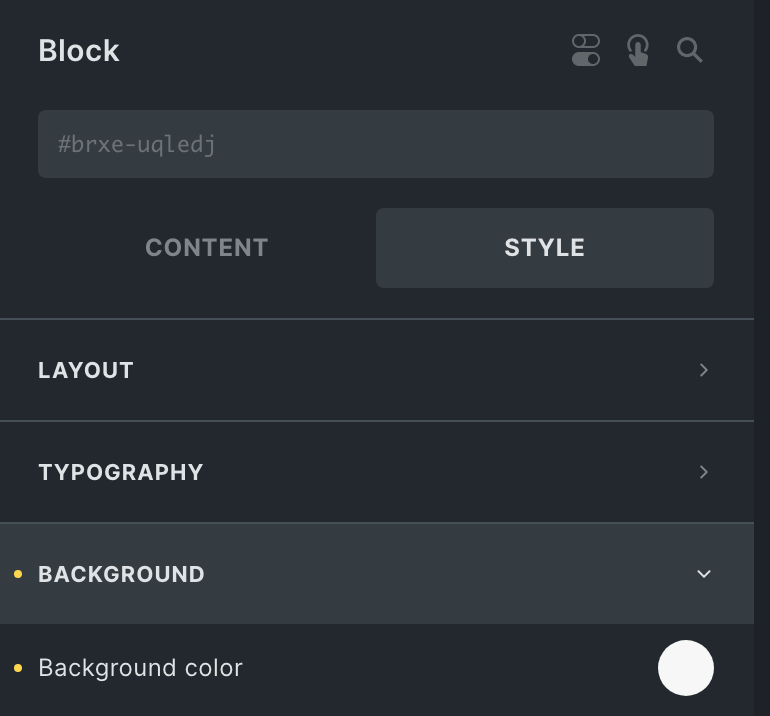
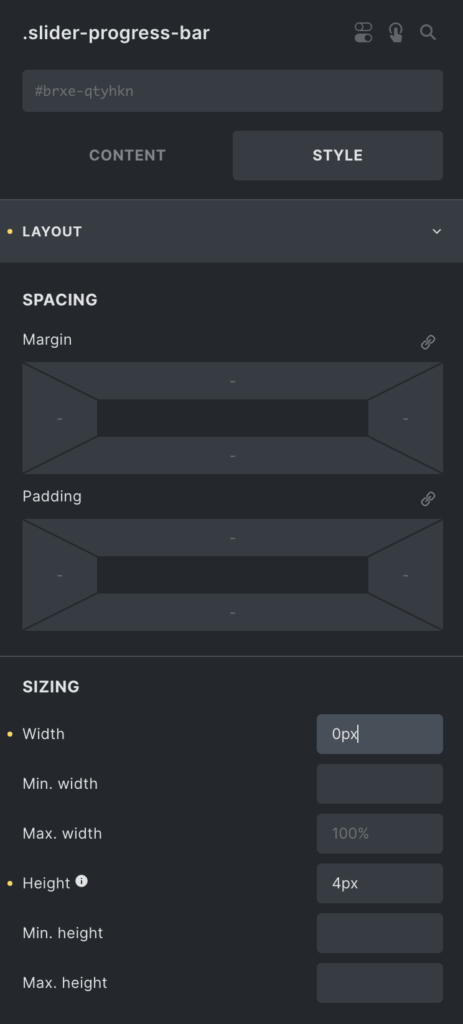
Let’s jump on the progress bar div now.
First of all, assign the width to 0px and the desired height (4px in this example):
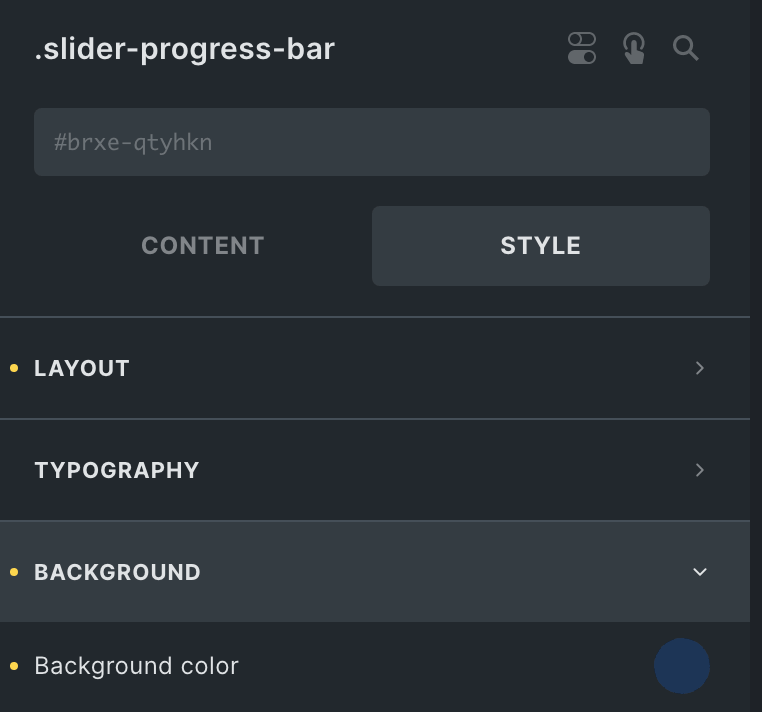
Then, set the desired background color of the progress bar:
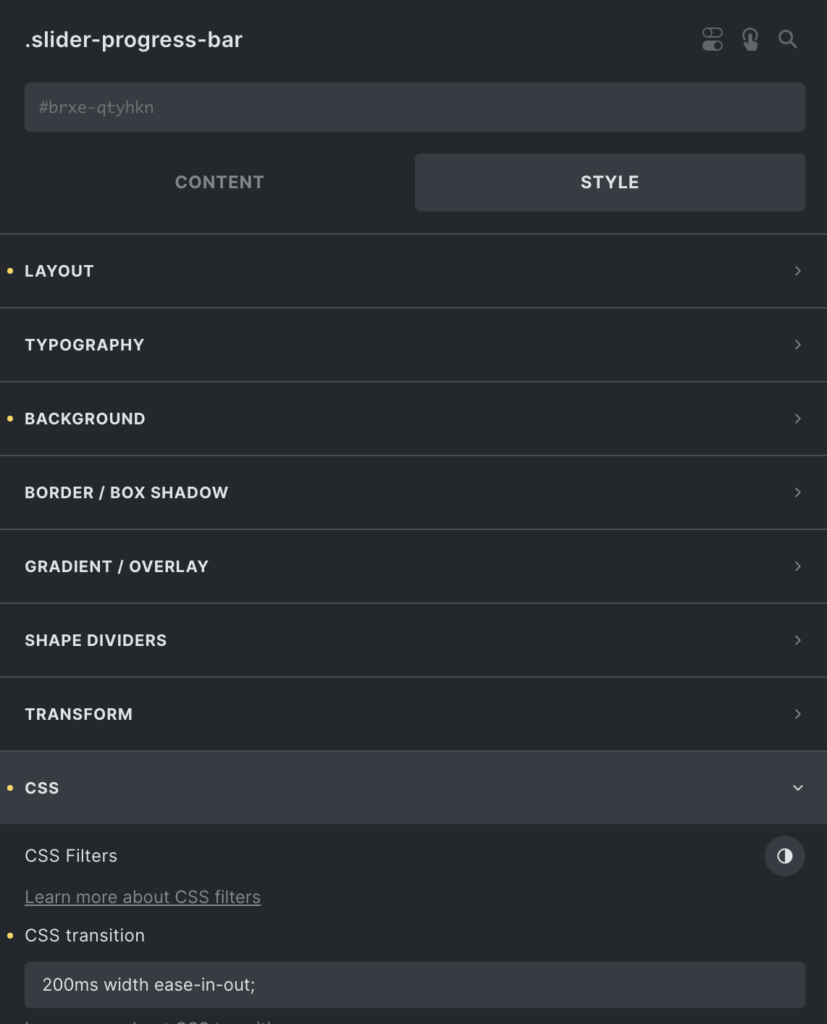
And finally, add a nice transition:
The JavaScript
Enqueue the following code in your child theme or use a code snippets plugin:
document.addEventListener('DOMContentLoaded', () => {

   // Query all the grid sliders on the page
   const sliders = document.querySelectorAll('.sliders-progress-wrapper');

   // Stop the function if there is no sync slider
   if (sliders.length < 1) return;

   // Debounce function
   const debounce = (fn, threshold) => {
      var timeout;
      threshold = threshold || 200;
      return function debounced() {
         clearTimeout(timeout);
         var args = arguments;
         var _this = this;

         function delayed() {
            fn.apply(_this, args);
         }
         timeout = setTimeout(delayed, threshold);
      };
   };

   // Init function
   const init = (bar, sliderId) => {

      // get the slider instance
      const instance = bricksData.splideInstances[sliderId];

      // Destroy the instance
      instance.destroy(true);

      // Change the width of the progress bar when mounted and when the slider moves
      instance.on('mounted move', function () {
         const end = instance.Components.Controller.getEnd() + 1;
         const rate = Math.min((instance.index + 1) / end, 1);
         bar.style.width = String(100 * rate) + '%';
      });

      // Remount the instance
      instance.mount();

   };

   // Loop into each wrapper
   sliders.forEach(slider => {

      // Query the progress bar element
      const bar = slider.querySelector('.slider-progress-bar');

      // Query the nested slider element
      const mainSlider = slider.querySelector('.slider-main');

      // Get the instance ID generated by Bricks
      const sliderId = mainSlider.dataset.scriptId;

      // Run the function on load
      setTimeout(() => {
         init(bar, sliderId);
      }, 0);

      // Rerun the function on resize because bricks reinit the sliders on each resize event

      window.addEventListener("resize", debounce(() => {
         init(bar, sliderId);
      }, 300));

   });
});
If everything worked correctly, you should now see the progress bar working on frontend:
Resources
https://www.freecodecamp.org/news/javascript-debounce-example/

